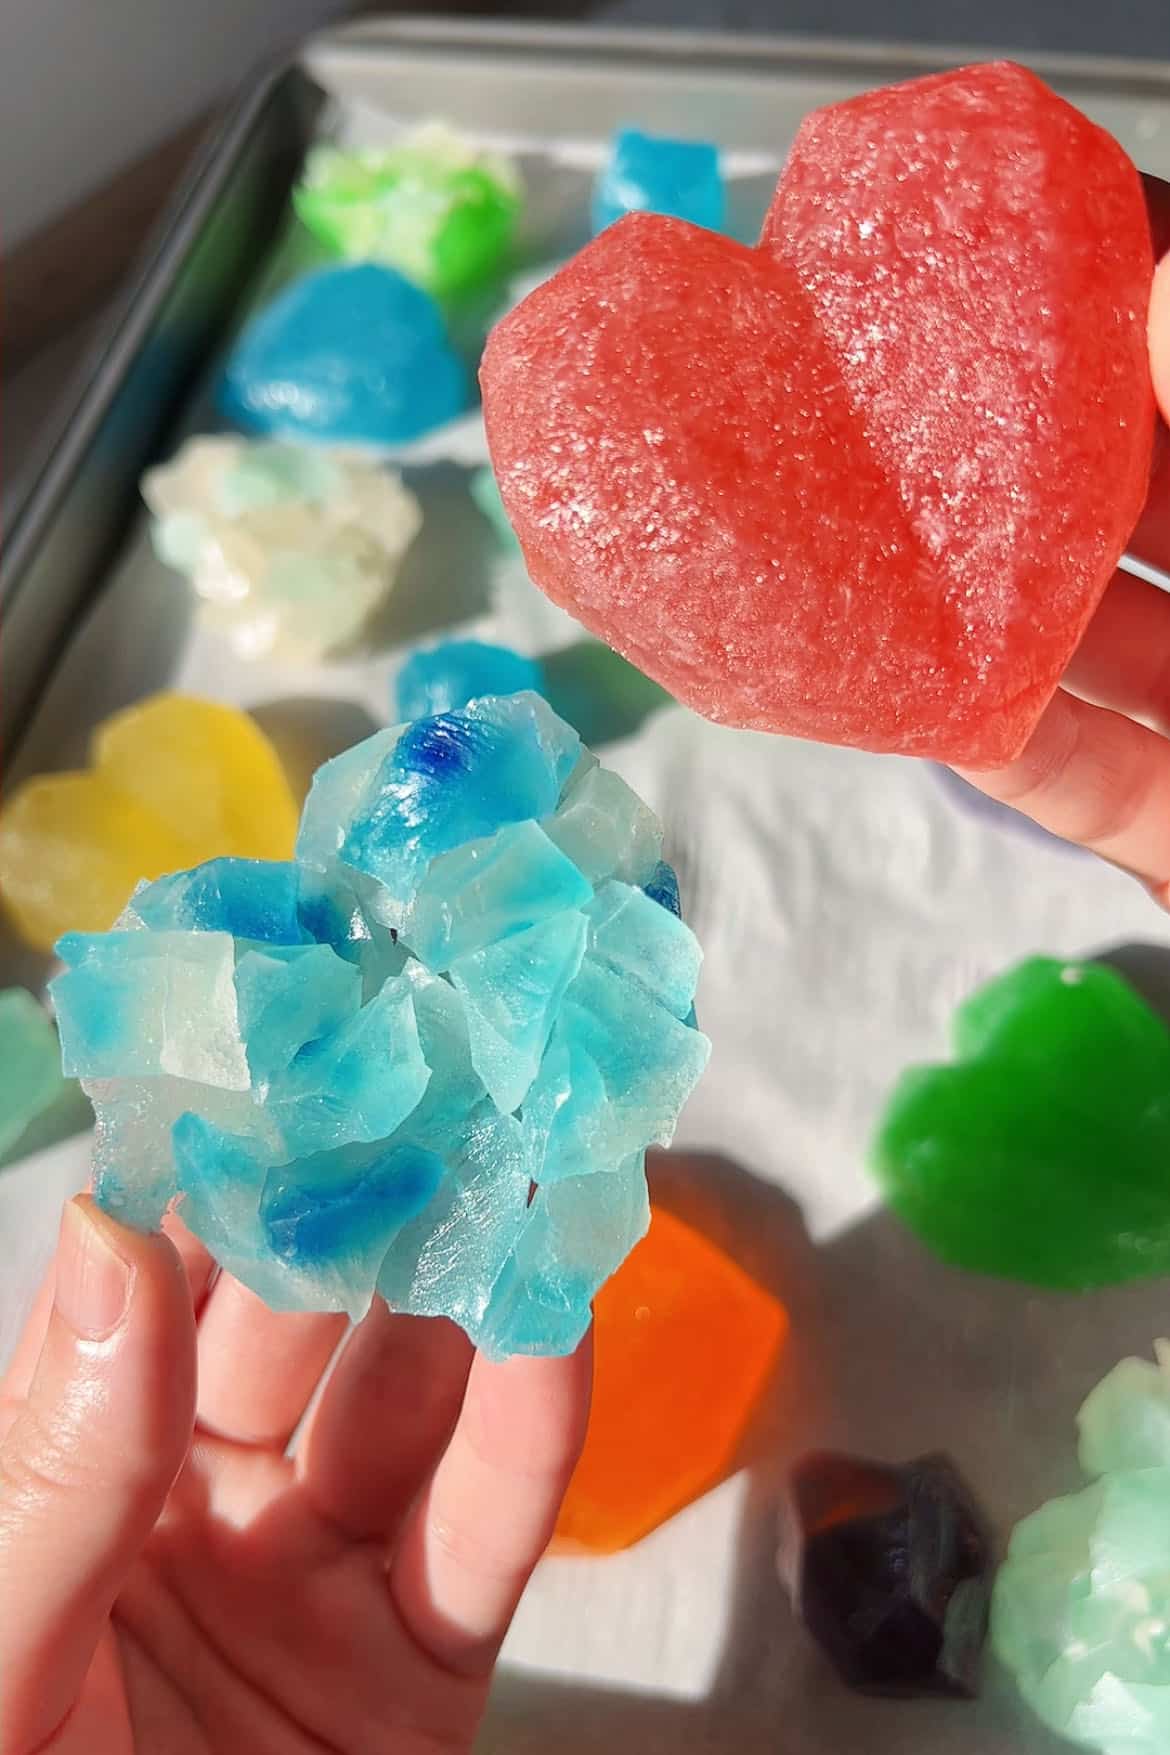
Welcome to the enchanting world of crystal candy. Here, vibrant colors and delightful textures come together. This creates a treat that's as pleasing to the eye as it is to the palate.
As I dive into the fascinating experience of making silky gem crystal candy, I'm excited to share with you not just how to make candy crystals. But also the joy of enjoying them. These unique confections are perfect for any occasion. They serve as both delicious sweets and stunning decorative pieces for your events.
Join me on this sugary journey. Let's explore how to craft your own exquisite crystal candies at home!
What is Crystal Candy?
Crystal candy is a treat for both the eyes and taste buds. It's more than sugar; it's a story of creativity and skill. It introduces us to a world of unique candies, with silky gem crystal candy leading the way.
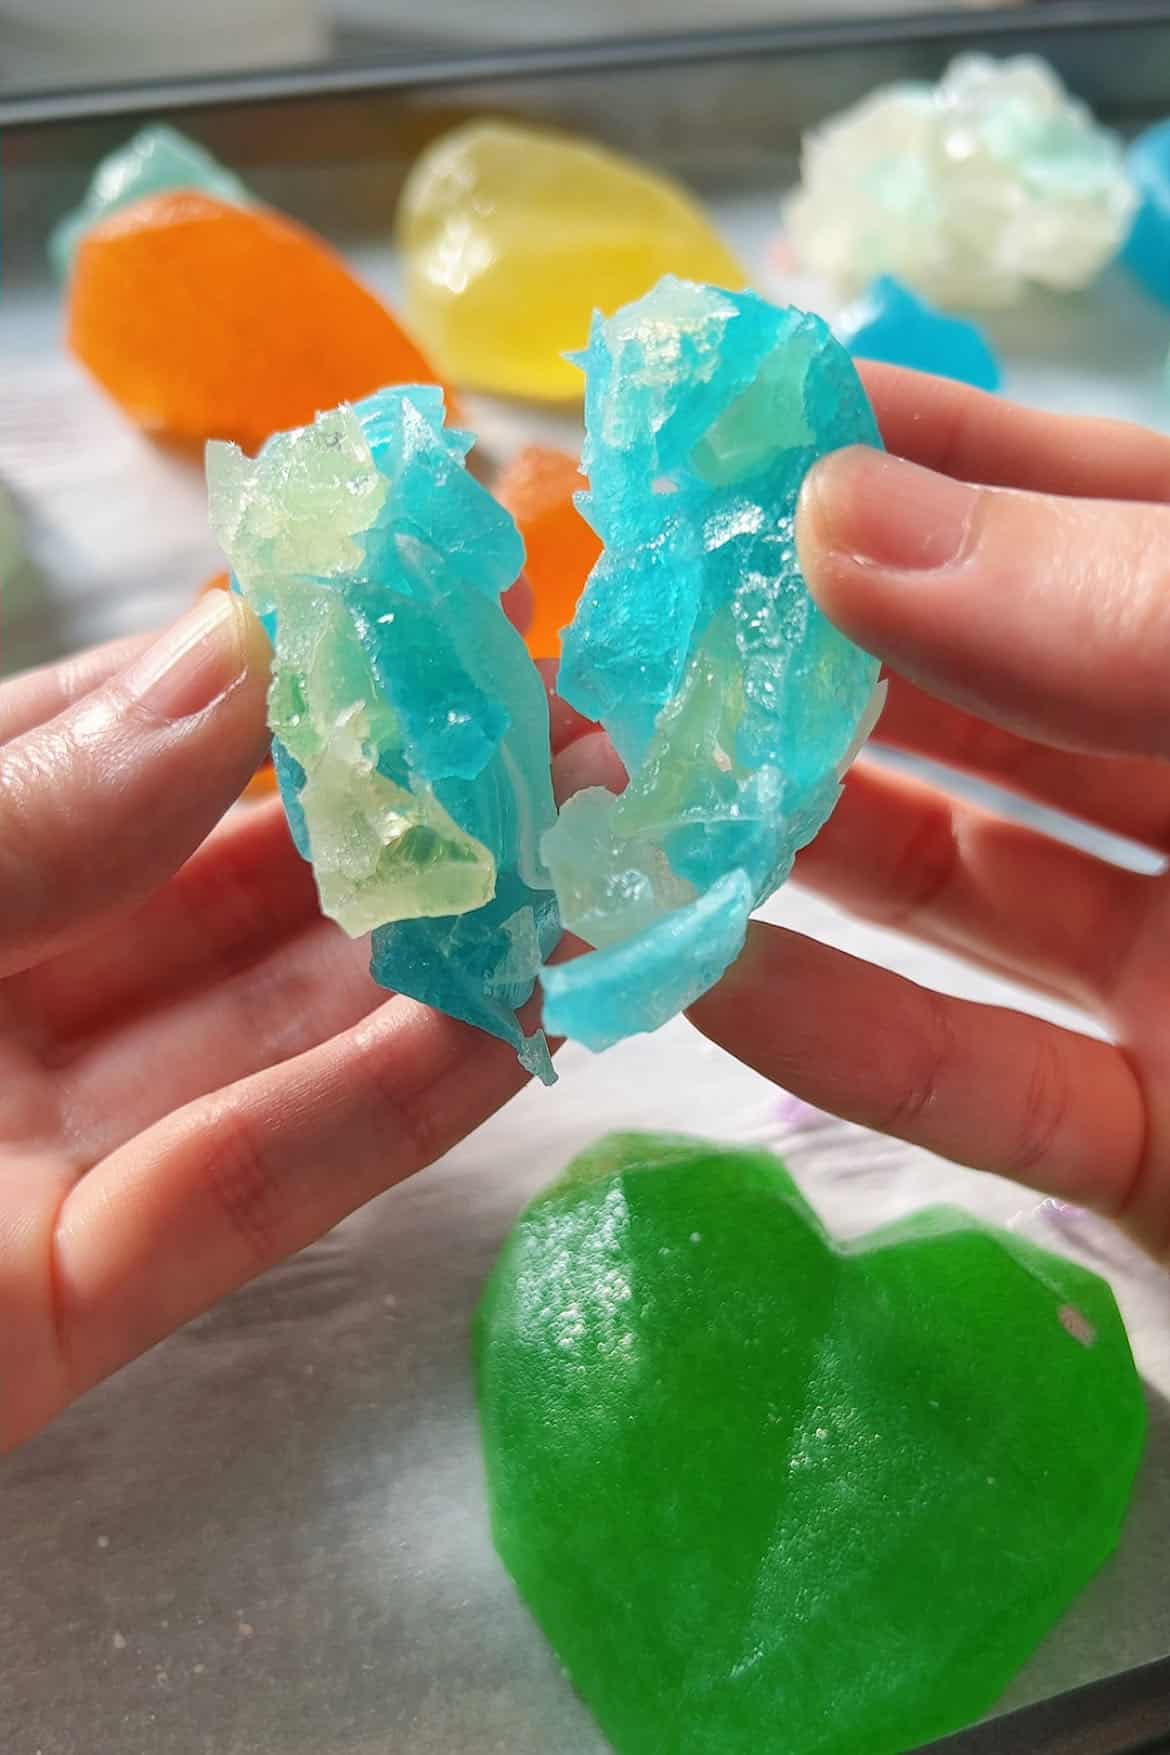
Crystal candy is a beautiful treat made from sugar and water. It's made by boiling the ingredients until they're just right, then cooling them to form crystals. This process creates candy that looks like crystals.
Its origins come from cultural traditions where sweets are a big part of celebrations. Making this candy is a true art form.
Silky gem crystal candy is known for its smooth texture and shiny look. Its beauty makes it perfect for special events. It's often seen on social media, where it gets lots of attention.
When I make silky gem crystal candy, I enjoy the taste and the art of creating something beautiful. It's a joy to make candies that look like jewels.
For more candy inspirations, check out this Raw Carob Chocolates recipe.
How to Make Crystal Candy at Home
- Prep Time: 10 minutes
- Cooking Time: 15 minutes
- Total Time: 7 days (including crystallization)
- Yield: 10 servings
- Method: Boiling
- Cuisine: Dessert
Making homemade crystal candy is a fun adventure. It brings out the sweet chemist in anyone. This guide covers the essential ingredients, step-by-step instructions, and tips to create stunning candy crystals.
Essential Ingredients for Making Candy Crystals
To begin making crystal candy, I collect a few key ingredients:
- Sugar: This forms the base of the candy crystals.
- Corn Syrup: It aids in crystallization, adding sweetness and texture.
- Water: Needed to dissolve sugar and create syrup.
- Flavorings: A few drops of your favorite extracts, like vanilla or peppermint, add a delightful twist.
Step-by-Step Instructions for Crafting Crystal Candy
Creating candy crystals at home is simple:
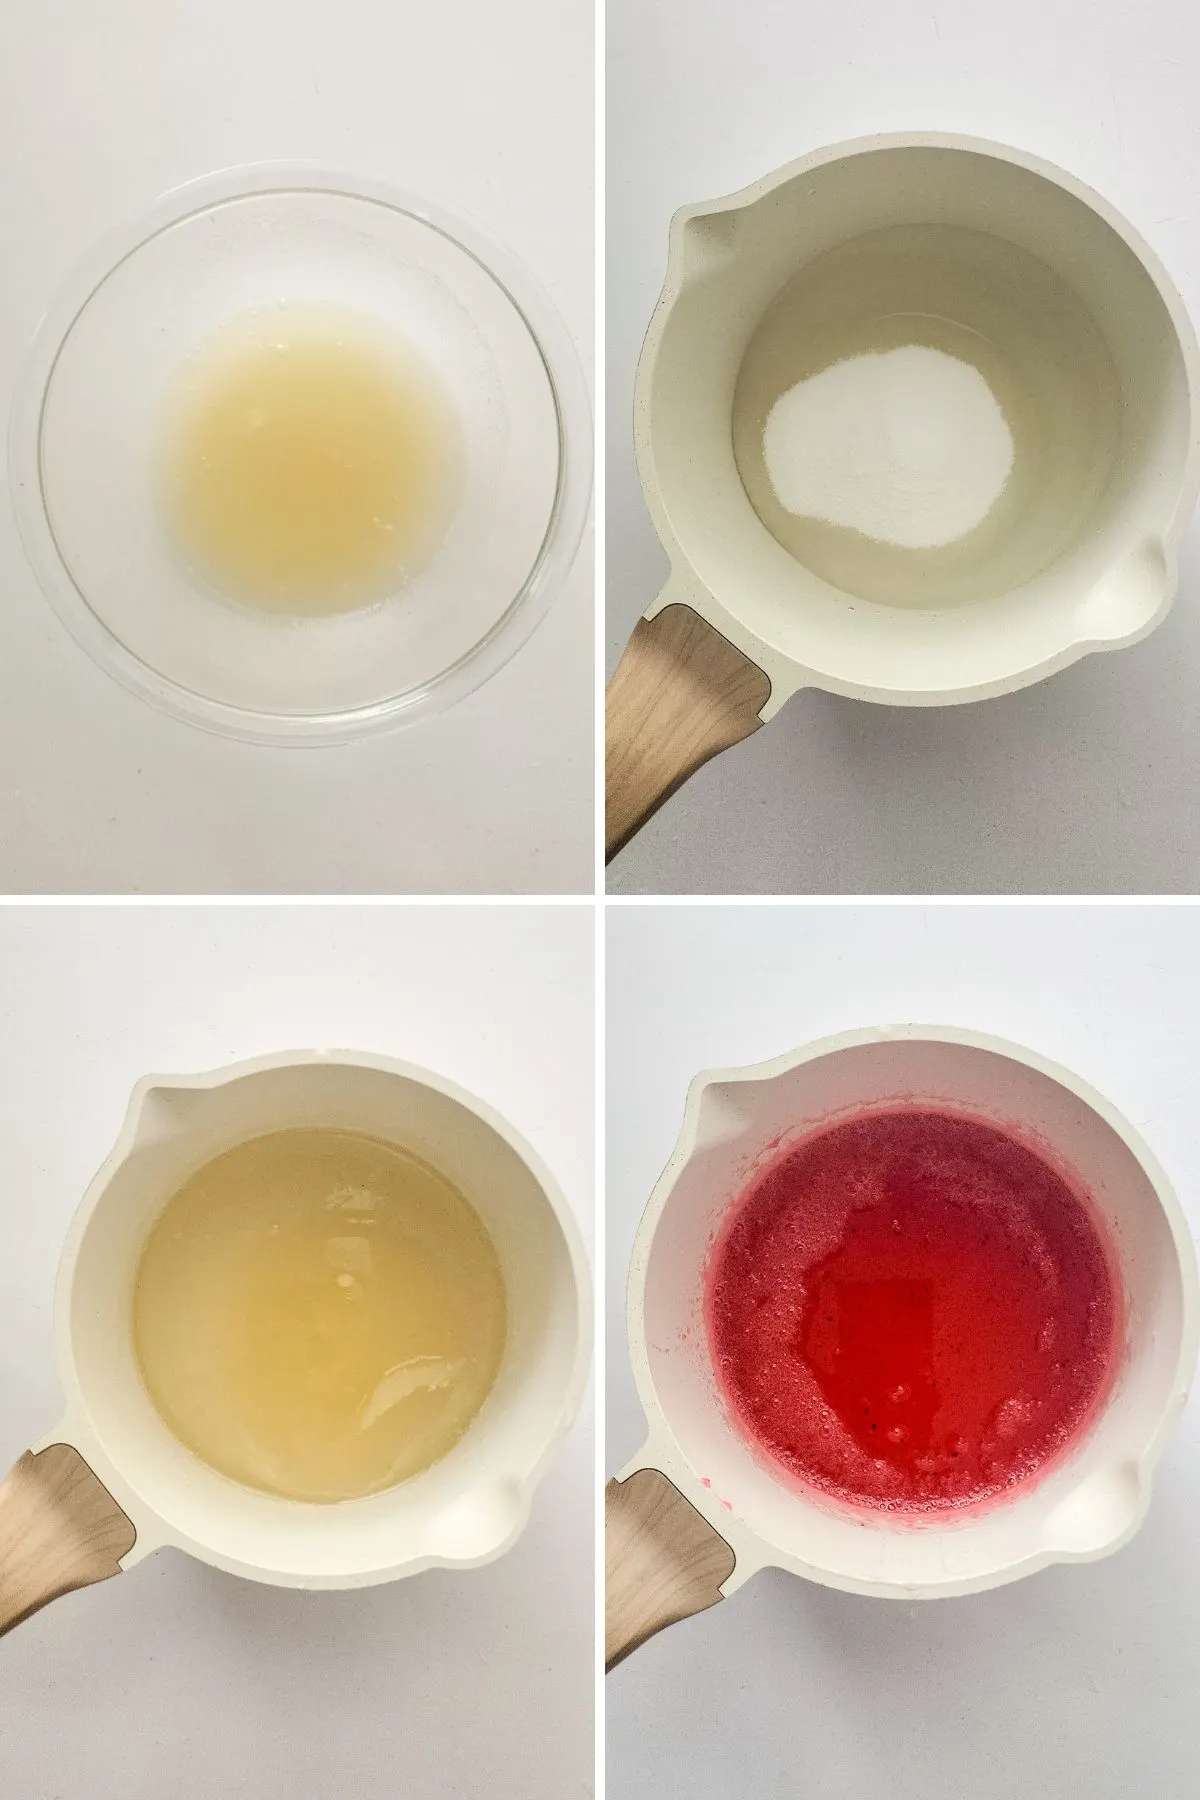
- Combine 2 cups of sugar, 1 cup of corn syrup, and 1 cup of water in a saucepan.
- Heat the mixture over medium heat, stirring until the sugar dissolves completely.
- Allow the mixture to boil without stirring. Once it boils, remove it from heat.
- Add your chosen flavorings and let the mixture cool slightly.
- Pour the solution into a clean glass container and let it sit undisturbed in a cool, dry place.
- Wait about a week for crystals to form.
Nutrition Facts (Per Serving)
- Calories: 150
- Sugar: 38g
- Sodium: 5mg
- Fat: 0g
- Saturated Fat: 0g
- Unsaturated Fat: 0g
- Trans Fat: 0g
- Carbohydrates: 39g
- Fiber: 0g
- Protein: 0g
- Cholesterol: 0mg
Notes
- Use natural sweeteners like honey for a healthier option.
- Store candies in an airtight container.
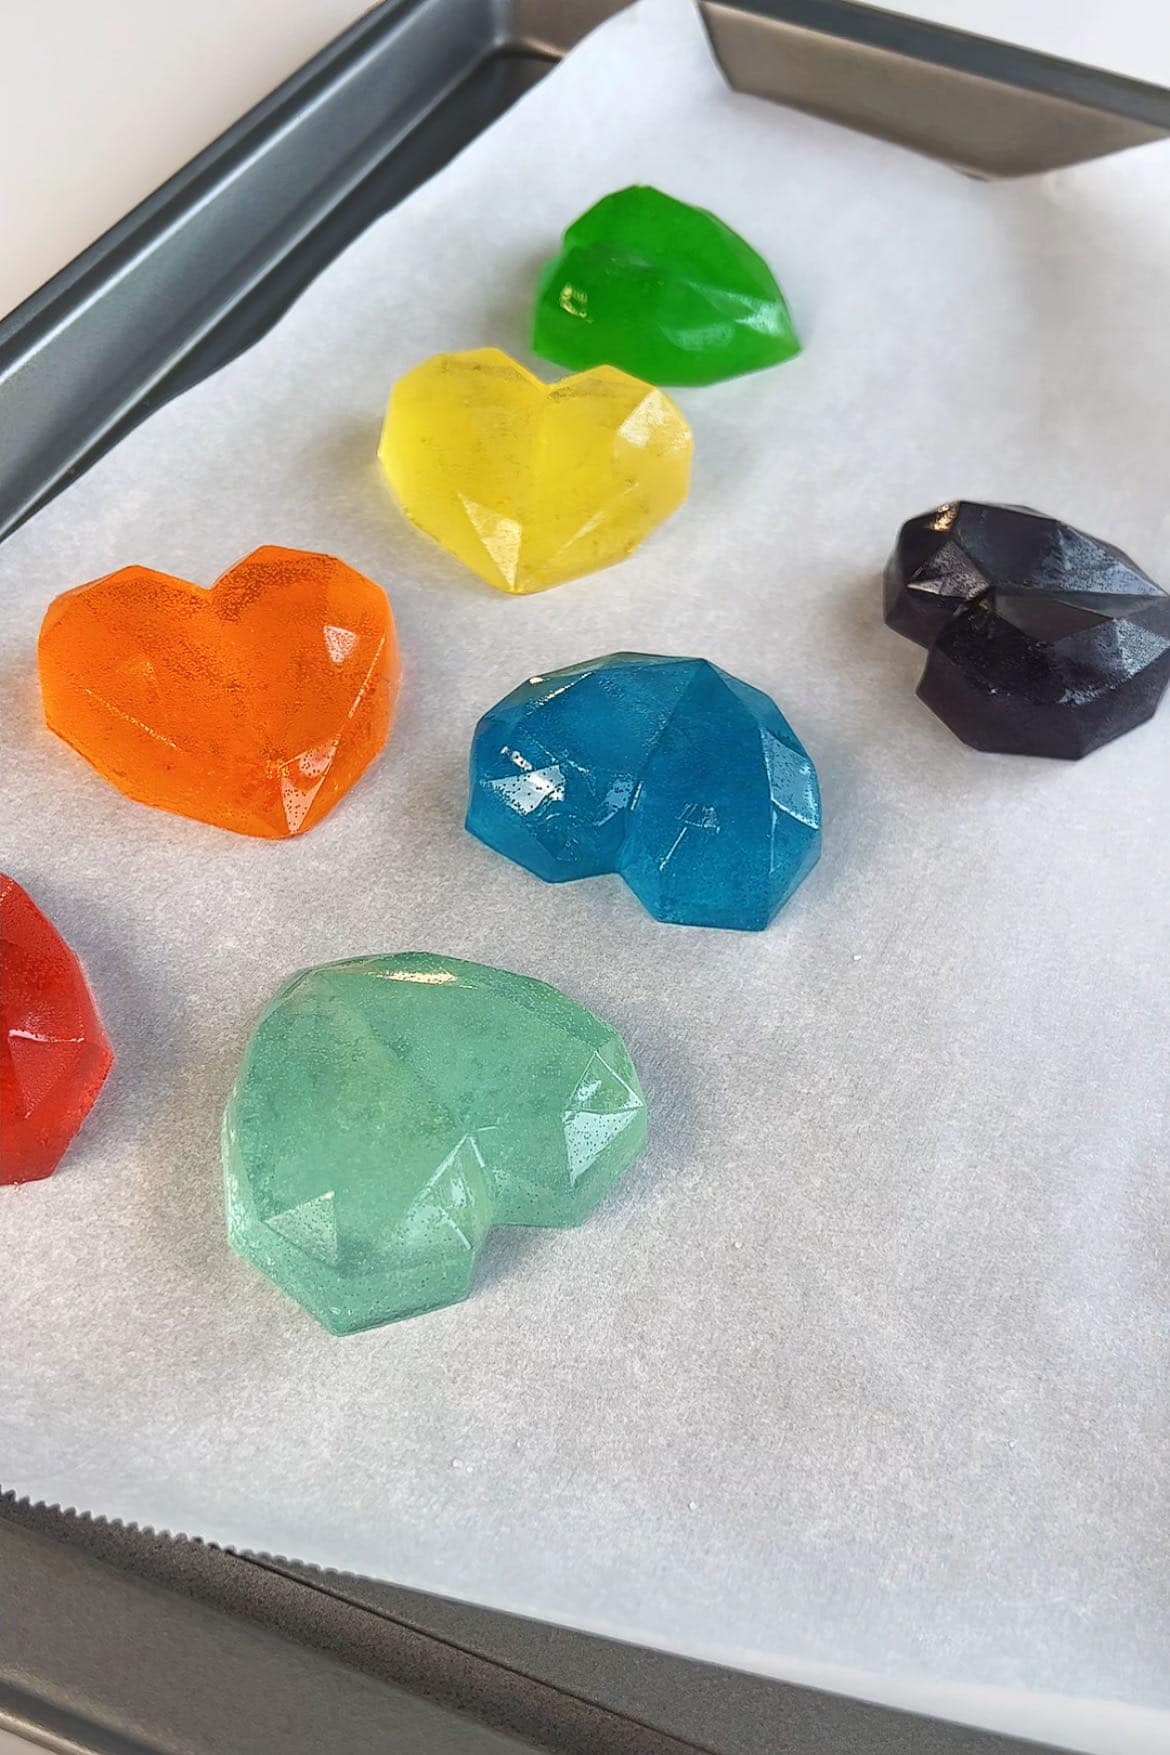
- Crystals can be colored using natural dyes.
Varieties of Crystal Candies
Making crystal candies is a fun journey, especially with all the flavor options. I love trying classic tastes like vanilla and strawberry. But I also enjoy bold mixes like lavender or matcha. Using top-notch extracts and natural colors makes my candies taste great and look amazing.
Flavor Combinations for Unique Crystal Creations
Some of my top picks for crystal candy flavors are:
- Classic vanilla bean with a hint of almond
- Fresh strawberry paired with basil
- Elderflower mixed with lemon
- Rich chocolate combined with sea salt
- Exotic matcha complemented by coconut
Every flavor adds something unique, making my candies a joy to eat and see. Natural colors make them even more inviting.
Decorative Ideas for Your Crystal Candy
After making the perfect batch, it's time to think about how to present them. I like to make my candies stand out by:
- Sprinkling edible glitter or luster dust for a shimmering effect
- Creating stunning arrangements in decorative jars as party favors
- Incorporating them into dessert platters for an eye-catching display
These ideas not only make my treats look great but also make them the highlight of any event. My crystal candies are true showstoppers that bring happiness and sweetness to any gathering.
Why Crystal Candy is a Great Treat for Everyone
Crystal candy is a versatile treat that's perfect for any celebration. It adds elegance and charm to any event, like birthdays, weddings, or holidays. Guests love the colorful, eye-catching sweets, making any moment special.
Perfect for Celebrations and Special Occasions
I always choose crystal candy to make my events stand out. It's great for:
- Birthday parties
- Weddings
- Baby showers
- Holiday festivities
These treats are not only tasty but also beautiful. They add a special touch to any celebration. Their unique flavors and sparkle make them unforgettable for everyone.
Healthier Options for a Sweet Indulgence
Enjoying sweets doesn't have to be bad for you. I like trying healthier candy options. Using natural sweeteners like honey or agave reduces sugar. Adding fresh fruit juices boosts flavor and nutrition.
Crystal candy is a great choice for anyone, any time. It's perfect for celebrating or just treating yourself. It's a delightful option that's both beautiful and healthy.
Making crystal candy at home is incredibly joyful. It's a way to create sweet, vibrant treats that amaze everyone. By making these treats, we add magic to our kitchens.
Don't be afraid to get creative with your candy. Each piece you make shows off your unique style and passion. It's a chance to show off your creativity.
For more recipes, visit Tales Of A Kitchen.
FAQs
Q: What exactly is crystal candy?
A: Crystal candy is a sweet treat made from sugar, water, and flavorings. It forms beautiful, vibrant structures. They taste amazing and look stunning!
Q: How can I make silky gem crystal candy at home?
A: To make silky gem crystal candy, you need sugar, corn syrup, water, and flavorings. Follow a recipe that guides you through heating and cooling the mix. This helps the crystals form right.
Q: What flavors work best for candy crystals?
A: You can try many flavors for your candy crystals! Vanilla and strawberry are favorites, but you can also use lavender, matcha, or fruit juice for something different.
Q: Can I make these crystal candies healthier?
A: Yes, you can! Use natural sweeteners or fruit juices for flavor. This makes them less sweet but still delicious.
Q: What are some decorative ideas for my crystal candy?
A: To make your crystal candies look even better, sprinkle them with edible glitter or use luster dust. You can also arrange them nicely for parties. They're perfect as a centerpiece!
Q: Why are crystal candies popular for celebrations?
A: Crystal candies are unique and eye-catching, making them great for birthdays, weddings, and more. They're tasty and add elegance and fun to any event.
Print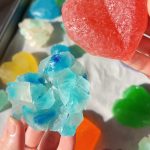
Crystal Candy Magic: Your Sweetness Source!
- Prep Time: 10 minutes
- Cook Time: 15 minutes
- Total Time: 7 days (including crystallization)
- Yield: 10 servings
- Category: Desserts
- Method: Boiling
- Cuisine: American
Description
Dive into a dazzling world of sweetness with Tales Of A Kitchen’s guide to making your own mesmerizing crystal candy at home. Spark joy with every bite!
Ingredients
- Sugar: This forms the base of the candy crystals.
- Corn Syrup: It aids in crystallization, adding sweetness and texture.
- Water: Needed to dissolve sugar and create syrup.
- Flavorings: A few drops of your favorite extracts, like vanilla or peppermint, add a delightful twist.
Instructions
- Combine 2 cups of sugar, 1 cup of corn syrup, and 1 cup of water in a saucepan.
- Heat the mixture over medium heat, stirring until the sugar dissolves completely.
- Allow the mixture to boil without stirring. Once it boils, remove it from heat.
- Add your chosen flavorings and let the mixture cool slightly.
- Pour the solution into a clean glass container and let it sit undisturbed in a cool, dry place.
- Wait about a week for crystals to form.
Notes
- Use natural sweeteners like honey for a healthier option.
- Store candies in an airtight container.
- Crystals can be colored using natural dyes.
Nutrition
- Serving Size: 1
- Calories: 150
- Sugar: 38g
- Sodium: 5mg
- Fat: 0g
- Saturated Fat: 0g
- Unsaturated Fat: 0g
- Trans Fat: 0g
- Carbohydrates: 39g
- Fiber: 0g
- Protein: 0g
- Cholesterol: 0g